Table of Contents
If you have ever pushed an update to your live website only to watch it break in front of your visitors, you will understand the sinking feeling that follows. Whether it is a plugin conflict, a theme incompatibility, or a misconfigured server setting, live errors can damage your reputation, hurt your search rankings, and cost you real money. The solution is straightforward: set up a staging environment for your website before making any significant changes. In this guide, we will walk you through everything you need to know about staging environment web hosting, why it matters, and how to get one running properly.
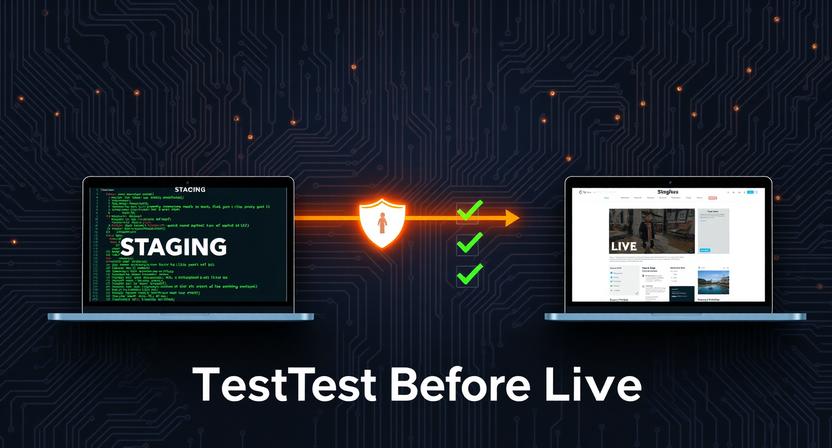
What Is a Staging Environment?
A staging environment is essentially a private, near-identical copy of your live website. It exists on a separate server or subdomain and is not visible to the public or indexed by search engines. Think of it as a rehearsal space where you can test changes, updates, and new features without any risk to your production site.
Staging environments are used by developers, designers, and website owners alike. Whether you are running a small business website or a large e-commerce platform, having a staging site is considered best practice in the web development industry. It provides a safe buffer between your ideas and their real-world consequences.
Why You Need a Staging Environment for Web Hosting
Many website owners skip this step because it seems like extra work. However, the time you invest in setting up a staging environment will save you considerably more time dealing with live site emergencies later on.
Protect Your Live Website
Your live website is your digital shopfront. Any downtime or visual errors can erode trust with your audience almost instantly. A staging environment means that untested code never reaches your visitors. You can experiment freely, knowing your live site remains stable and professional.
Test Updates Safely
Content management systems like WordPress regularly release updates for core files, themes, and plugins. Each update carries the potential for conflicts. By testing these updates in a staging environment first, you can identify any issues and resolve them before applying changes to your live site.
Collaborate Without Risk
If you work with a team of developers or designers, a staging environment gives everyone a shared workspace. Multiple people can work on features simultaneously without interfering with the live site or each other’s progress. This is particularly valuable for agencies managing multiple client websites.
Improve Your Development Workflow
A proper staging setup encourages a disciplined workflow: develop locally, test on staging, then deploy to production. This three-stage process is widely regarded as the gold standard for professional web development and dramatically reduces the likelihood of costly errors.
How to Set Up a Staging Environment: Step-by-Step
There are several methods for setting up a staging environment, depending on your hosting plan and technical comfort level. Below, we cover the most common approaches.
Method 1: Use Your Hosting Provider’s Built-In Staging Tool
Many modern web hosting providers now offer one-click staging environments as part of their managed hosting packages. This is by far the easiest option for those who are not deeply technical.
To use this method, log in to your hosting control panel and look for a staging or cloning option. Providers such as managed WordPress hosts often allow you to create a staging site with a single click. The system will automatically clone your live site to a subdomain such as staging.yourwebsite.co.uk. Once you have finished testing, you can push the changes back to your live site just as easily.
If you are unsure whether your current hosting plan supports staging, check your provider’s documentation or contact their support team. For more advice on choosing the right hosting solution for your needs, visit DaManager blog for helpful guides and comparisons.
Method 2: Set Up a Staging Subdomain Manually
If your host does not offer a built-in staging tool, you can create one manually. Here is how to do it:
Step 1 – Create a subdomain: Log in to your hosting control panel and navigate to the subdomain manager. Create a new subdomain such as staging.yourwebsite.co.uk. Assign it a dedicated directory on your server.
Step 2 – Copy your website files: Using an FTP client such as FileZilla, copy all of your live website files into the new staging directory. This includes your themes, plugins, uploads, and core files.
Step 3 – Export and import your database: Access your live site’s database via phpMyAdmin and export it as a SQL file. Then create a new database for your staging environment and import the SQL file into it.
Step 4 – Update your configuration file: Update your site’s configuration file (for WordPress, this is wp-config.php) to point to the new staging database. Update the database name, username, and password accordingly.
Step 5 – Update site URLs in the database: Use a tool such as Better Search Replace or run SQL queries to update all references from your live domain to your staging subdomain throughout the database.
Step 6 – Password protect the staging site: This is a critical step. Add password protection to your staging subdomain via your hosting control panel or using an .htpasswd file. This prevents search engines from indexing the duplicate content and stops the public from accidentally accessing it.
Method 3: Use a Local Development Environment
Another popular approach is to use a local development environment on your own computer. Tools such as LocalWP (formerly Local by Flywheel), XAMPP, and MAMP allow you to run a full web server locally. This is ideal for solo developers who want a fast, offline workspace.
The main limitation of local environments is that they are not accessible to other team members and may not perfectly replicate your live server configuration. For collaborative projects, a hosted staging environment is generally the better choice.
Best Practices for Managing Your Staging Environment
Keep Staging in Sync With Live
Your staging site should always reflect the current state of your live site. Before beginning any new round of testing, refresh your staging environment with the latest version of your live site’s files and database. This ensures you are always testing against an accurate replica.
Never Use Real Customer Data
If your website handles personal data, be careful about what you copy to staging. Wherever possible, anonymise or replace sensitive customer information. This is not just good practice, it is a requirement under data protection legislation such as the UK GDPR.
Document Your Changes
Keep a record of every change you test in the staging environment. This makes it much easier to replicate successful changes on the live site and to diagnose any issues that arise during deployment.
Automate the Deployment Process
As your workflow matures, consider using deployment tools such as DeployHQ, Buddy, or GitHub Actions to automate the process of pushing tested changes from staging to production. Automation reduces human error and speeds up your release cycle significantly.
Final Thoughts
Setting up a staging environment for your website is one of the smartest investments you can make in your online presence. Whether you opt for your hosting provider’s built-in tools, a manually configured subdomain, or a local development setup, the key is to make staging a non-negotiable part of your workflow. Staging environment for web hosting does not have to be complicated or expensive, it simply requires a bit of planning and the right approach. Start today, and you will wonder how you ever managed without it.